Startup programs and applications are very convenient as they help in saving your time when you turn on your computer. When you are in hurry or in rush, having the most used applications as startup applications will auto-start so that you need not waste your time search for the program in your system. Though having startup applications has many advantages, often when there are many startup programs, it is likely that it might affect the bootup time of your system. So, it is important to manage your Startup Programs. By changing your startup programs, you can easily boost your system’s load time. You can get rid of the unnecessary programs and the applications that you hardly use. There are many ways in which you can manage the startup programs in your windows 10. In this blog, I will explain the 4 common ways to do this. Let us get started.
Ways to change or Manage Startup Programs in Windows 10:
Four ways to manage or change your Startup programs/applications in your Windows 10 :
The four common ways to change your startup application on windows 10 are as follows:
- Changing Startup Programs in settings
- Using Task Manager to change the Startup Apps
- Changing startup applications using the Startup Folder
- Change Startup Program in the System Refixer
Changing Startup Programs/ applications in settings:
- In your Windows system, go to the start button and type in the search bar, click on settings.
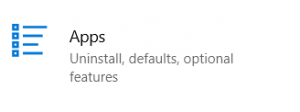
- Under Settings, you’ll see many options like Devices, System, Personalization, etc among that choose Apps.
- Under Apps, you get the list of all apps in the system.
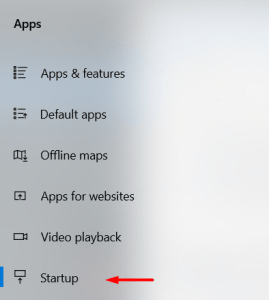
- Now make sure that the apps that you want to run as Startup apps are turned on and the rest of the apps are turned off.
- If the application you want to run as a startup app is not listed then you can change it by adding it as a shortcut to your system’s Window Startup folder.
Also Check: Solve Windows 10 Taskbar Not Working Issues with These Solutions
Using Tasks Manager to change the Startup Apps/ programs:
This is the most common way to manage your startup programs in the Windows 10 system. The majority of the Windows users find this simple and convenient compared to the other methods. This method is similar to the above-mentioned method. But the only difference is that you can directly get the list of applications from the task manager.
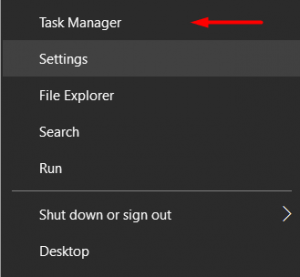
- Right-click on the start button which is in the right-left corner of your system.
- In the search bar type Task Manager and select the option.
- Under Task Manager, you will find many options related to the system, among them choose the Startup tab.
- Now you can get the list of all the programs and applications in the system. You can see the status of all the applications.
- They will be either enabled or disabled. If you want any application as a startup program you can enable it and if you dont want an application as the startup program you can disable it.
Changing startup applications/programs using the Startup Folder:
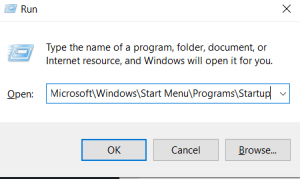
- In your system, open the Windows Run dialog box by pressing Windows Key + R.
- Path: %AppData%\Microsoft\Windows\Start Menu\Programs\Startup – Copy paste the above path in the text bar and press on OK.
- Now open the start screen. Do right-click on the application that you want as a startup program. Select the Open file location, you might find this under the More submenu.
- After finding the required program shortcut, copy it ( CTRL+C) and paste it (CTRL+V) to the Startup application folder that you opened before.
- Now when you start the system this particular program or for whatever programs you did will automatically start.
- In case you want to delete the program from the auto start, then you can remove it from the shortcut folder by following the similar process mentioned above.

Changing Startup Programs/ applications in the System Refixer:
The System Refixer is a free system cleaner utility that has the function and allows you to change and manage the startup programs on your windows 10 system. This method is the least preferred as people are not so comfortable with using the System Refixer. If you are someone who is used to this utility then you might find it simple, else you can also go with any of the three ways mentioned above.
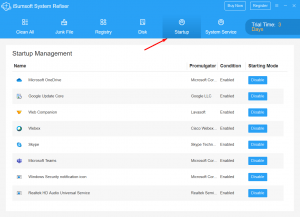
- Go to System Refixer in your system and click on the startup button, that you will find on the menu
- You can now see a list of startup applications, and on the condition column, you can find the indication. It indicates if the program is set for an auto startup from Windows 10 or not.
- You can enable the programs you want and also you can disable them by click on the program and selecting Disable start.
- If you want to auto start a program and you see it is disabled, then you can enable it by clicking on the Resume boot option that is located beside the program name.
- After making the required changes, you can notice it once you start your system.
Conclusion:
These are the different ways you can follow to add, delete, change or manage the startup programs and applications in your Windows 10 system. All the methods that are mentioned in this blog are easy. Among them, I prefer the first and second methods as I find them more comfortable and simple, you can follow any method that you find simple. I hope this blog has the information you are looking for regarding the modification of startup applications. Let me know which method you followed and how this blog has helped you. Also, through comments let me know if there are easier and more ways to change the startup application in the Windows 10 system.
